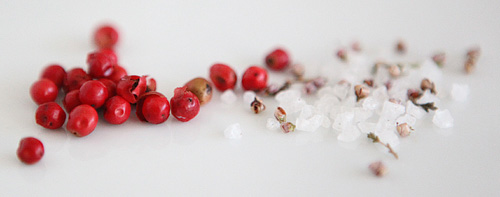
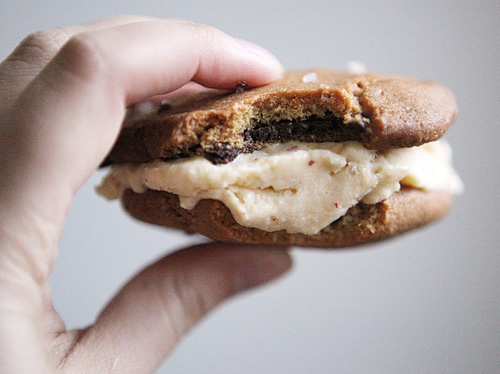
I am delighted to introduce my October blog collaborator, Siri from The Transplanted Baker. The title of her blog refers to Siri’s status as an American ex-pat living on the west coast of Norway. We decided to continue with the Norwegian theme with the art selection so we chose the famous painting The Scream by Edvard Munch. If any of you are familiar with the Ice Cream song by Johnson, Moll & King, I scream, you scream, we all scream for ice cream!, then our recipe selection should not be much of a surprise. I proceeded with my savory theme by making salt & pepper sweets but be sure to visit Siri’s site for her recipe for Red Currant Ice Cream made from hand-picked, home-canned currants!

oil, tempera, and pastel on cardboard, 91 x 73.5 cm, National Gallery, Oslo
Edvard Munch is best known for his painting The Scream (Skrik) (1893) that is part of the series titled The Frieze of Life. The entire series of works embodied themes of life and death, love and fear as well as melancholy. Painted in an expressionist style, the painting depicts a figure in agony against a foreboding sky and the landscape of Oslofjord. The original title of the painting was the German phrase Der Schrei der Natur (The Scream of Nature). According to the writing of Munch:
“I was walking down the road with two friends when the sun set; suddenly, the sky turned as red as blood. I stopped and leaned against the fence, feeling unspeakably tired. Tongues of fire and blood stretched over the bluish black fjord. My friends went on walking, while I lagged behind, shivering with fear. Then I heard the enormous, infinite scream of nature.”
– Edvard Munch, quoted in Munch Cameo (1996) by Jose Maria Faerna (1)

If you like baking and vintage aprons then you will love Siri’s blog, The Transplanted Baker. She has been posting a collection of bun recipes that range from Norwegian classics like Skolleboller to American favorites like Buttermilk Biscuits Spiked with Jalapeño and Cheddar in celebration of her own little bun in the oven. In addition to a vast assortment of recipes of anything and everything baking-related, Siri includes photographs of breathtaking Norwegian landscapes. I especially like her series of Yellow August photographs and those from her cherry picking adventure in Hardanger. If you ever dreamed of living in a place with idyllic mountain vistas and a creamy brown goat’s milk cheese called Geitost then I highly suggest living vicariously through Siri on her blog The Transplanted Baker.

Pink Peppercorn Ice Cream
adapted from A Homemade Life
1 cup whole milk
2 cups double cream
3/4 cup vanilla sugar
pinch of salt
6 egg yolks
1 tsp vanilla extract
1 1/2 tsp ground pink peppercorns
Combine the milk, 1 cup cream, sugar and salt in a saucepan over medium heat. Stir occasionally until hot but be sure to keep the mixture from boiling.
Whisk the egg yolks in a medium size bowl and place it in an ice bath (a larger bowl with 1 cup water and several ice cubes). Remove the hot milk mixture from the heat and let it cool for about 30 seconds before slowly pouring half of the mixture into the egg yolks while continuously whisking. Pour the warm egg mixture back into the saucepan with the remaining milk mixture.
Cook over medium-low heat until the sauce begins to thicken and it will coat the back of a wooden spoon (about 5 minutes). Pour the remaining cream in a large bowl and place a strainer over it. Strain the milk/egg mixture into the cream and place into the ice bath. Let cool in the ice bath before stirring in the vanilla and pink peppercorns. Spoon into an airtight container and place in the freezer.
Check the ice cream after 45 minutes. Once it begins to freeze around the edges, remove it from the freezer and beat with a hand-held mixer. This will break up the crystals and yield a smoother ice cream. Once mixed, return to the freezer and repeat the process every 30 minutes for 2-3 hours until the ice cream is frozen. The ice cream is best enjoyed immediately.

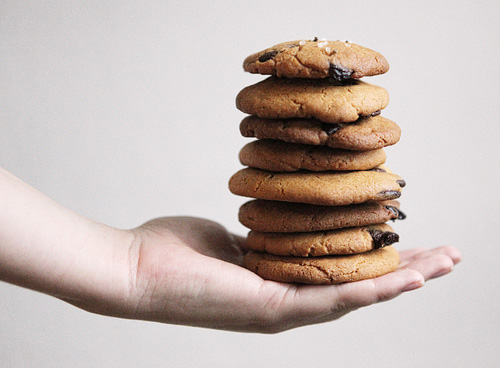
Bittersweet Chocolate Chips with Heather Salt
adapted from the NY Times
2 cups minus 2 TB cake flour
1 2/3 cups all-purpose flour
1 1/4 tsp baking soda
1 1/2 tsp baking powder
1 1/2 tsp salt
1 1/4 cups butter
1 1/4 cups brown sugar
1 cup + 1 TB sugar
2 eggs
2 tsp vanilla extract
500 g 60% cacao content bittersweet chocolate
heather salt
Sift flour, baking powder and soda, and salt into a bowl. Cream the butter and sugar together for 5 minutes until light. Add eggs, mixing between each addition and then the vanilla. Mix the dry ingredients on a a low speed until just combined. Carefully mix in the chocolate pieces, wrap in plastic and chill in the fridge for 36 hours (up to 72).
Preheat the oven to 350°F/180°C and line the baking tray with parchment paper. Scoop six golf-ball size balls of dough and place on tray. Sprinkle with the heather salt and bake about 18 minutes until golden brown but still soft. Transfer cookies to a wire rack to cool.

24 comments
michaela says:
Oct 8, 2009
um, yes please! great painting and great recipes.
Jen (Tiny Urban Kitchen) says:
Oct 8, 2009
This looks fantastic! And I just started my first batch of vanilla sugar (it#39;s been in there for almost 2 days now – is that enough time?). I might just have to try this, except with my ice cream maker, which will make it a bit easier. :) Thanks for sharing.
Rosa's Yummy Yums says:
Oct 8, 2009
I love that painting! So eerie…br /br /Your cookie sandwiches look so droolworthy! Nice combo!br /br /Cheers,br /br /Rosa
Hungry Dog says:
Oct 8, 2009
Interesting tip about hand-beating the ice cream to prevent ice crystals. The sandwiches look so pretty. I don#39;t know what heather salt is…must look that up. Beautiful post.
Belle@Ooh, Look says:
Oct 9, 2009
This is gorgeous (the recipe, that is). I didn#39;t realise The Scream was based on a nature walk, either, so it#39;s all very interesting!
amanda says:
Oct 9, 2009
Have always loved that painting. Must admit that when I go on nature walks with my kids, my face looks exactly like that guy…br /br /I#39;m a sucker for ice cream sandwiches. I try and make them as a special treat every once in awhile (for myself)br /br /Lovely post…
Lauren says:
Oct 9, 2009
Thats so cool! Peppercorn icecream? Never would have crossed my mind! Love it.
shaz says:
Oct 9, 2009
That ice-cream sandwich looks screamingly good! Don#39;t think I#39;ve heard of heather salt before, very intriguing. Funny – when i saw the title of your post and Munch#39;s name I immediately thought of that song!
Heavenly Housewife says:
Oct 9, 2009
What a fascinating flavour! Its quite dramatic for an ice cream sandwich, kind of like The Scream.
MeetaK says:
Oct 9, 2009
yum! now this is an exceptional flavor combination! This painting of The Scream has always given my imagination a real jog. I imagine so many things – the why? when? what? and each time come up with a new story. I am sure that the movie Scary Movie also was inspired by this painting. HAHAHA!
Reemski says:
Oct 9, 2009
oooh, icecream sandwich!!!
dessert girl says:
Oct 9, 2009
Those both look so good! You#39;re making me crazy here! :-) I just finished off a salted chocolate candy bar from Vosges that was sooo good. I#39;m definitely trying those cookies!
Snooky doodle says:
Oct 9, 2009
ow many yummy cookies :)
Jaime says:
Oct 9, 2009
Found your blog through From Me to You- this is such a great idea for a blog! :)br /br /That ice cream sounds good too!br /br /Jaimebr /laviejaime.blogspot.com
Hungry Dog says:
Oct 9, 2009
I just sent a little blog love your way over at the Hungry Dog… :)
oneordinaryday says:
Oct 9, 2009
Found you through Hungry Dog. What a great blog! I love how you blend art with good food. Very cool.
Siri says:
Oct 10, 2009
Megan! Such a nice post….br /br /Did you know my husband#39;s favorite dessert is homemade ice cream sandwhiches? I keep a bag stocked of them in the fridge so that there is never an after-dinner hissy fit. br /br /Soon as we get back to Norway, I#39;ll be churning out a batch of this. br /br /Thanks for all the nice words and a fun collaboration, SiRi
Hannah says:
Oct 10, 2009
I -love- this! Pink peppercorns are so beautiful, but I always struggle to find ways to actually use them. Spicy ice cream is brilliant!
Julie says:
Oct 10, 2009
I have always been captivated by the flowing lines of this painting. It is perfect for the month of October and our big Halloween celebrations!br /br /As always, your recipes are surprising in their flavor combinations. You always think outside of the box.
Hannah says:
Oct 22, 2009
Gorgeous photo! I love how you managed to capture the steam rising from the bowl. :)
Julia @ Mélanger says:
Oct 25, 2009
That ice cream sounds so different!
Lael says:
Nov 6, 2009
Thanks for visiting my blog! Yes, I love A Homemade Life and Molly#39;s (and Brandon#39;s) restaurant, Delancey. Definitely worth a visit someday! As for this blog post…when I have access to an ice cream maker, I#39;ll have to give this ice cream a go. One of my favorite ice cream shops in San Francisco is Humphry Slocombe and it makes a quot;Salt-N-Peppaquot; ice cream with pink peppercorns…it#39;s a small detail that makes a big difference in the attractiveness of the dish. So yummy with a sweet ice cream alongside!
Cookie_love | Não Me Mande Flores says:
Dec 5, 2012
[…] Chocolate Chips with Heather Salt, do Feasting on Art (com receita!). 2. Chocolate Chip Cookies, via Vivian Mac. 3. Butterscotch Pudding Triple Chip […]
Bess says:
Feb 24, 2013
Hi there,
just wonder if I may use your image of The Scream in a presentation of mine. May I trouble you to get back to me please? Thanks much!
Cheers,
Bess